CAPTCHA Solver API Integration: Step-by-Step Tutorial
Step-by-step tutorial for integrating a CAPTCHA solver API into any project. Covers authentication, task creation, polling, error handling, and production best practices.
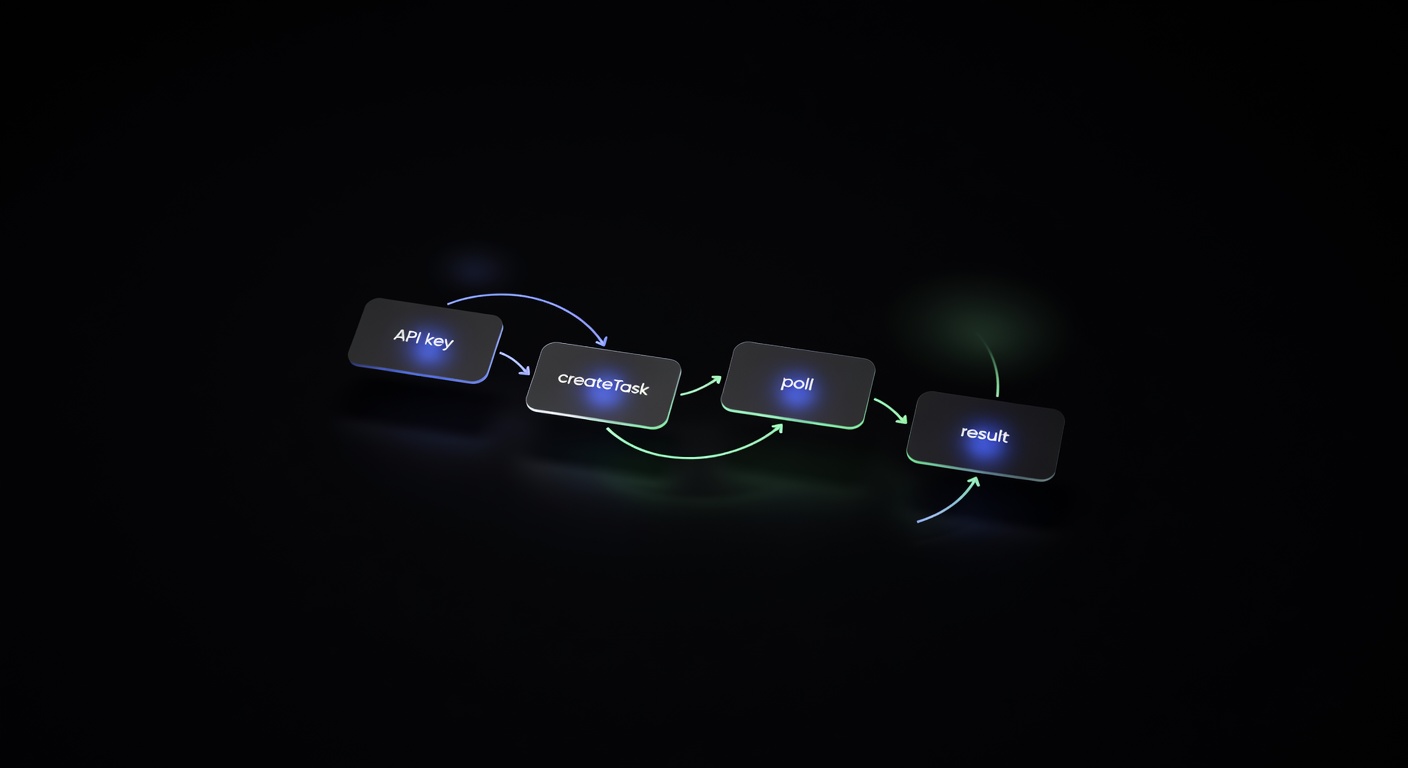
Integrating a CAPTCHA solver API into your project is the most reliable way to handle automated CAPTCHA challenges at scale. Whether you are building a data pipeline, a monitoring service, or a testing framework, the integration follows the same pattern: authenticate, create a task, poll for results, and use the returned token. This guide walks through every step with production-ready code.
How the Integration Flow Works
Every CAPTCHA solver API, including uCaptcha, follows a two-phase request model:
- Create Task — You describe the CAPTCHA (type, site key, page URL) and the API queues it for solving.
- Get Result — You poll until the solver returns a token or an error.
The reason for the two-phase model is simple: CAPTCHAs take time. A reCAPTCHA v2 challenge might take 15 seconds for a human solver or an AI model to complete. Rather than holding an HTTP connection open, the API returns a task ID immediately and lets you check back.
Here is the flow visualized:
Your App ──POST /createTask──▶ uCaptcha API ──▶ Solver Network
   │                              │
   │◀── { taskId: "abc123" } ◀───┘
   │
   │──POST /getTaskResult──▶ uCaptcha API
   │◀── { status: "processing" }◀─┘
   │
   │──POST /getTaskResult──▶ uCaptcha API
   │◀── { status: "ready", solution: {...} }◀─┘
   │
   ▼
Use solution token in target request
Step 1: Get Your API Key
uCaptcha uses a clientKey for authentication. Every request you make includes this key. To get one:
- Open the uCaptcha Telegram Bot or the dashboard at ucaptcha.net.
- Create an account (Telegram login).
- Generate an API key from the dashboard or via the
/newkeybot command. - Fund your balance with crypto or Telegram Stars.
Your key will look something like ucap_a1b2c3d4e5f6.... Store it in an environment variable — never hard-code it.
export UCAPTCHA_KEY="ucap_your_key_here"Step 2: Create a Task
The /createTask endpoint accepts a JSON body with your clientKey and a task object describing the CAPTCHA. The task.type field determines which parameters are required.
Endpoint: POST https://api.ucaptcha.net/createTask
Request body:
{
  "clientKey": "ucap_your_key_here",
  "task": {
    "type": "RecaptchaV2TaskProxyless",
    "websiteURL": "https://example.com/login",
    "websiteKey": "6Le-wvkSAAAAAPBMRTvw0Q4Muexq9bi0DJwx_mJ-"
  }
}
Response:
{
  "errorId": 0,
  "taskId": "7c5a1e2b-3d4f-5a6b-7c8d-9e0f1a2b3c4d"
}
If errorId is non-zero, the request failed. Check the errorCode and errorDescription fields for details.
Supported Task Types
uCaptcha routes to five providers (CapSolver, 2Captcha, AntiCaptcha, CapMonster, Multibot, and uCaptcha’s own infrastructure), so it supports a wide range of task types:
| Category | Task Types |
|---|---|
| reCAPTCHA | RecaptchaV2TaskProxyless, RecaptchaV2Task, RecaptchaV3TaskProxyless |
| hCaptcha | HardCaptchaTaskProxyless, HardCaptchaTask |
| Turnstile | TurnstileTaskProxyless, TurnstileTask |
| FunCaptcha | FunCaptchaTaskProxyless, FunCaptchaTask |
| Image | ImageToTextTask |
| GeeTest | GeeTestTaskProxyless |
For proxy-based task types (without the Proxyless suffix), you include proxy details in the task object. Proxyless variants are simpler and are what most integrations use.
Step 3: Poll for Results
Once you have a taskId, poll /getTaskResult until the status changes from "processing" to "ready".
Endpoint: POST https://api.ucaptcha.net/getTaskResult
Request body:
{
  "clientKey": "ucap_your_key_here",
  "taskId": "7c5a1e2b-3d4f-5a6b-7c8d-9e0f1a2b3c4d"
}
Response (processing):
{
  "errorId": 0,
  "status": "processing"
}
Response (ready):
{
  "errorId": 0,
  "status": "ready",
  "solution": {
    "gRecaptchaResponse": "03AGdBq24PBCb..."
  }
}
Polling Strategy
Do not poll too aggressively. A sensible strategy:
- Wait 5 seconds after creating the task before the first poll.
- Poll every 3-5 seconds after that.
- Set a maximum timeout of 120 seconds (most CAPTCHAs solve well within 60).
- If you exceed the timeout, treat it as a failure and optionally retry.
Step 4: Complete Python Example
Here is a full, working integration in Python using the requests library:
import os
import time
import requests

API_URL = "https://api.ucaptcha.net"
CLIENT_KEY = os.environ["UCAPTCHA_KEY"]

def create_task(task: dict) -> str:
    """Create a CAPTCHA solving task and return the task ID."""
    response = requests.post(f"{API_URL}/createTask", json={
        "clientKey": CLIENT_KEY,
        "task": task,
    })
    data = response.json()
    if data.get("errorId", 0) != 0:
        raise Exception(f"createTask failed: {data.get('errorCode')} - {data.get('errorDescription')}")
    return data["taskId"]

def get_result(task_id: str, timeout: int = 120, interval: int = 4) -> dict:
    """Poll for the task result until ready or timeout."""
    deadline = time.time() + timeout
    time.sleep(5)  # initial wait

    while time.time() < deadline:
        response = requests.post(f"{API_URL}/getTaskResult", json={
            "clientKey": CLIENT_KEY,
            "taskId": task_id,
        })
        data = response.json()

        if data.get("errorId", 0) != 0:
            raise Exception(f"getTaskResult failed: {data.get('errorCode')}")

        if data.get("status") == "ready":
            return data["solution"]

        time.sleep(interval)

    raise TimeoutError(f"Task {task_id} did not complete within {timeout}s")

def solve_recaptcha_v2(site_url: str, site_key: str) -> str:
    """Solve a reCAPTCHA v2 and return the response token."""
    task_id = create_task({
        "type": "RecaptchaV2TaskProxyless",
        "websiteURL": site_url,
        "websiteKey": site_key,
    })
    solution = get_result(task_id)
    return solution["gRecaptchaResponse"]

# Usage
if __name__ == "__main__":
    token = solve_recaptcha_v2(
        site_url="https://example.com/login",
        site_key="6Le-wvkSAAAAAPBMRTvw0Q4Muexq9bi0DJwx_mJ-",
    )
    print(f"Solved! Token: {token[:50]}...")
This pattern works for any CAPTCHA type. Change the task.type and the required fields, and parse the matching solution key from the result.
Quick Examples for Other CAPTCHA Types
hCaptcha:
task_id = create_task({
    "type": "HardCaptchaTaskProxyless",
    "websiteURL": "https://example.com/signup",
    "websiteKey": "a5f74b19-9e45-40e0-b45d-47ff91b7a6c2",
})
solution = get_result(task_id)
token = solution["gRecaptchaResponse"]
Cloudflare Turnstile:
task_id = create_task({
    "type": "TurnstileTaskProxyless",
    "websiteURL": "https://example.com",
    "websiteKey": "0x4AAAAAAABS7vwvV6VFfMcD",
})
solution = get_result(task_id)
token = solution["token"]
Image to text:
import base64

with open("captcha.png", "rb") as f:
    body = base64.b64encode(f.read()).decode()

task_id = create_task({
    "type": "ImageToTextTask",
    "body": body,
})
solution = get_result(task_id)
text = solution["text"]
reCAPTCHA v3 (score-based):
task_id = create_task({
    "type": "RecaptchaV3TaskProxyless",
    "websiteURL": "https://example.com/api/action",
    "websiteKey": "6Le-wvkSAAAAAPBMRTvw0Q4Muexq9bi0DJwx_mJ-",
    "minScore": 0.7,
    "pageAction": "submit",
})
solution = get_result(task_id)
token = solution["gRecaptchaResponse"]
Each CAPTCHA type returns its solution in a type-specific field. The table below maps task types to their solution keys:
| Task Type | Solution Field |
|---|---|
| RecaptchaV2TaskProxyless | gRecaptchaResponse |
| RecaptchaV3TaskProxyless | gRecaptchaResponse |
| HardCaptchaTaskProxyless | gRecaptchaResponse |
| TurnstileTaskProxyless | token |
| FunCaptchaTaskProxyless | token |
| ImageToTextTask | text |
Step 5: Error Handling
Robust error handling is the difference between a script that works in testing and one that works in production. Here are the errors you should handle:
API-Level Errors
| Error Code | Meaning | Action |
|---|---|---|
ERROR_KEY_DOES_NOT_EXIST | Invalid API key | Check your key |
ERROR_ZERO_BALANCE | Account has no funds | Top up balance |
ERROR_NO_SLOT_AVAILABLE | All solvers busy | Retry after 2-5 seconds |
ERROR_CAPTCHA_UNSOLVABLE | CAPTCHA could not be solved | Retry with a fresh task |
ERROR_TOO_MANY_REQUESTS | Rate limited | Back off exponentially |
Network-Level Errors
Always wrap your HTTP calls in try/except blocks to handle connection timeouts, DNS failures, and 5xx responses:
import requests
from requests.exceptions import RequestException

MAX_RETRIES = 3

def create_task_with_retry(task: dict) -> str:
    for attempt in range(MAX_RETRIES):
        try:
            response = requests.post(
                f"{API_URL}/createTask",
                json={"clientKey": CLIENT_KEY, "task": task},
                timeout=15,
            )
            response.raise_for_status()
            data = response.json()

            if data.get("errorId", 0) != 0:
                error_code = data.get("errorCode", "UNKNOWN")
                if error_code == "ERROR_NO_SLOT_AVAILABLE":
                    time.sleep(3 * (attempt + 1))
                    continue
                raise Exception(f"{error_code}: {data.get('errorDescription')}")

            return data["taskId"]

        except RequestException as e:
            if attempt == MAX_RETRIES - 1:
                raise
            time.sleep(2 * (attempt + 1))

    raise Exception("Max retries exceeded")
Step 6: Using the Legacy 2Captcha Format
If you are migrating from 2Captcha or using a library that expects the 2Captcha API format, uCaptcha supports full backward compatibility:
Submit a CAPTCHA:
POST https://api.ucaptcha.net/in.phpkey=ucap_your_key_here&method=userrecaptcha&googlekey=SITE_KEY&pageurl=https://example.comResponse: OK|TASK_ID
Retrieve the result:
GET https://api.ucaptcha.net/res.php?key=ucap_your_key_here&action=get&id=TASK_IDResponse: OK|TOKEN_VALUE or CAPCHA_NOT_READY
This means you can point existing 2Captcha client libraries at api.ucaptcha.net with no code changes — just swap the base URL and API key.
Step 7: Using Callbacks Instead of Polling
Polling works, but it means your application is making repeated HTTP requests while waiting. For high-throughput systems, callbacks are more efficient. You provide a URL, and the API sends the result to you when it is ready.
Include a callbackUrl in your task creation request:
{
  "clientKey": "ucap_your_key_here",
  "task": {
    "type": "RecaptchaV2TaskProxyless",
    "websiteURL": "https://example.com/login",
    "websiteKey": "6Le-wvkSAAAAAPBMRTvw0Q4Muexq9bi0DJwx_mJ-"
  },
  "callbackUrl": "https://your-server.com/captcha-callback"
}
Your callback endpoint will receive a POST with the solution as soon as it is ready. This eliminates polling entirely and reduces latency in event-driven architectures. See our guide on building a CAPTCHA solving microservice for a full callback-based architecture.
Step 8: Routing Configuration
One of uCaptcha’s key features is intelligent routing across multiple providers. When you create an API key, you can configure routing behavior:
- Cheapest — Routes to the lowest-cost provider for each task type.
- Fastest — Routes to the provider with the lowest current latency.
- Reliable — Routes to the provider with the highest success rate.
- Custom — Fine-tune cost, speed, and reliability sliders to your exact needs.
This is configured per API key in the dashboard — no code changes required. Your integration code stays the same regardless of which routing strategy you choose.
Production Best Practices
After getting the basics working, harden your integration for production:
1. Use environment variables for keys. Never commit API keys to version control.
2. Implement circuit breakers. If the API returns errors consistently, stop sending requests for a cooldown period rather than hammering the endpoint.
3. Log task IDs. When something goes wrong, having the task ID makes debugging straightforward. Log it at creation time.
4. Set appropriate timeouts. Image-to-text tasks are fast (3-10 seconds). reCAPTCHA v3 is fast (5-15 seconds). reCAPTCHA v2 can take up to 30 seconds. Tune your polling timeout to the task type.
5. Handle token expiry. CAPTCHA tokens expire. A reCAPTCHA token is valid for about 120 seconds. Use it promptly after receiving it.
6. Monitor your balance. Use the /getBalance endpoint to check your account balance programmatically and set up alerts before it runs out.
def get_balance() -> float:
    response = requests.post(f"{API_URL}/getBalance", json={
        "clientKey": CLIENT_KEY,
    })
    return response.json()["balance"]
7. Use proxy tasks when needed. If the target site is geofenced or rate-limits by IP, use proxy-based task types and pass your own proxy details. Proxyless is easier but the target site sees the solver’s IP, not yours.
Quick Reference: cURL Examples
For quick testing or debugging, you can use cURL directly from the terminal.
Create a task:
curl -X POST https://api.ucaptcha.net/createTask \
  -H "Content-Type: application/json" \
  -d '{
    "clientKey": "'"$UCAPTCHA_KEY"'",
    "task": {
      "type": "RecaptchaV2TaskProxyless",
      "websiteURL": "https://example.com",
      "websiteKey": "6Le-wvkSAAAAAPBMRTvw0Q4Muexq9bi0DJwx_mJ-"
    }
  }'
Poll for result:
curl -X POST https://api.ucaptcha.net/getTaskResult \
  -H "Content-Type: application/json" \
  -d '{
    "clientKey": "'"$UCAPTCHA_KEY"'",
    "taskId": "TASK_ID_HERE"
  }'
Check balance:
curl -X POST https://api.ucaptcha.net/getBalance \
  -H "Content-Type: application/json" \
  -d '{"clientKey": "'"$UCAPTCHA_KEY"'"}'
These are useful for verifying your API key works before writing any code, and for debugging issues in production.
Language-Specific Guides
This guide used Python for the examples, but the pattern is identical in every language. We have detailed tutorials for the most common stacks:
- Python — Solving CAPTCHAs with Python Requests covers building a reusable
UCaptchaClientclass with full error handling. - Node.js / TypeScript — Node.js CAPTCHA Solving Guide builds an async/await client module with TypeScript interfaces.
- Browser Automation — Puppeteer & Playwright Guide shows how to detect CAPTCHAs in headless browsers, solve them via API, and inject the tokens.
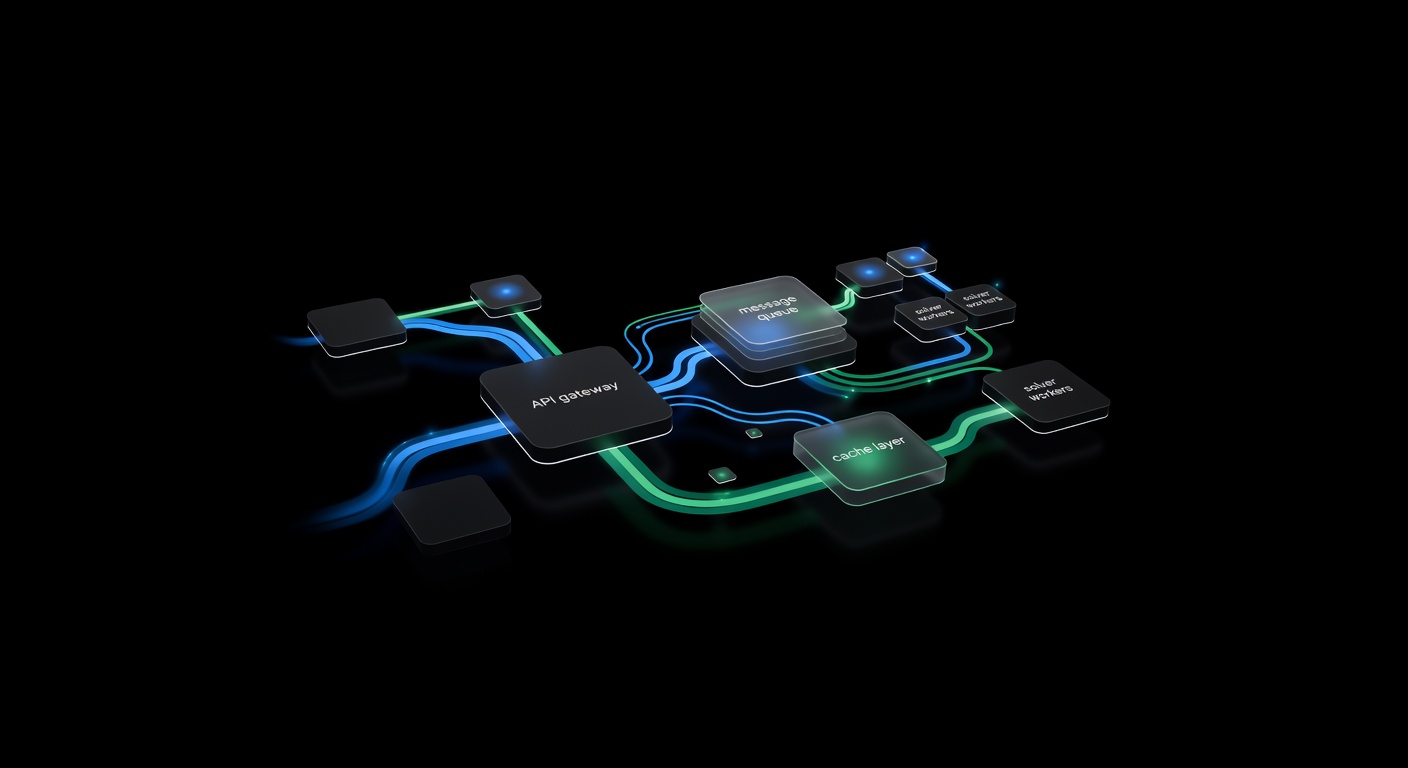
- Microservice Architecture — Building a CAPTCHA Solving Microservice covers queuing, callbacks, caching, and horizontal scaling for high-throughput systems.
Wrapping Up
The integration is straightforward: authenticate with your clientKey, submit a task with the right type and parameters, poll until solved, and use the token. The code examples above are production-ready starting points.
uCaptcha handles the hard part — routing your tasks across five providers to get the best combination of speed, cost, and reliability. You write the integration once, and the routing engine optimizes the rest. Sign up through the Telegram bot or the dashboard at ucaptcha.net to get your API key and start solving.
Frequently Asked Questions
How do I integrate a CAPTCHA solver API?
1) Get an API key, 2) Send a POST request to /createTask with your CAPTCHA parameters, 3) Poll /getTaskResult with the returned taskId until status is 'ready', 4) Use the solution token in your target request.
What programming languages can I use?
Any language that can make HTTP requests. Python, JavaScript/Node.js, Go, PHP, Ruby, Java, C#, and cURL are all common choices. The API is simple REST/JSON.
How long does it take to solve a CAPTCHA?
Typical solve times: reCAPTCHA v2 takes 10-30 seconds, hCaptcha 10-25 seconds, Turnstile 5-15 seconds, image-to-text 3-10 seconds. Lightning Mode can deliver pre-solved tokens in under 1 second.
Related Articles

Browser Automation CAPTCHA Solving: Puppeteer & Playwright Guide
Complete guide to solving CAPTCHAs during browser automation with Puppeteer and Playwright — detecting CAPTCHAs, extracting parameters, solving via API, and injecting tokens.
Building a CAPTCHA Solving Microservice with Queues & Callbacks
Architect a CAPTCHA solving microservice — REST API wrapper, task queue, callback webhooks, caching, and horizontal scaling for high-throughput solving.
Node.js CAPTCHA Solving: Complete Integration Guide
Integrate CAPTCHA solving into Node.js applications using fetch or axios. Covers async/await patterns, TypeScript types, and a reusable client module.